
It is a very trivial scenario that we would want to create a Common Data Service entity record from a web page. An example can be a contact us page or request for help that would create a lead or a case in Microsoft Dynamics backend. Although Dynamics Portals (and now Power Apps Portals) are available for this kind of integration, many organizations still use other types of web applications and they need to integrate with the Common Data Service, such as various web to lead products.
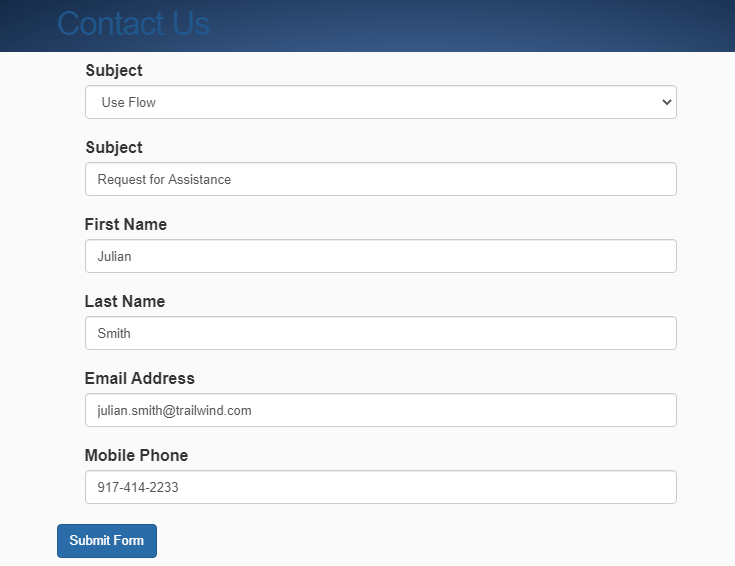
The image below demonstrates a sample page that we would want to use for contacting the company.
With the availability of Microsoft Power Automate flows, this process can be greatly simplified. Instead of having to build backend code to connect and authenticate with the Common Data Service, we simply provide a url for the flow that we are going to connect and get the data from.
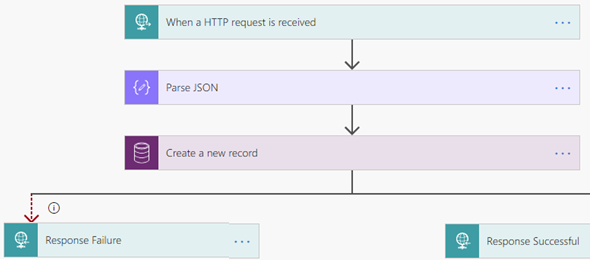
The image below shows the Power Automate flow that is used to receive data from a web page and process it in our Flow.
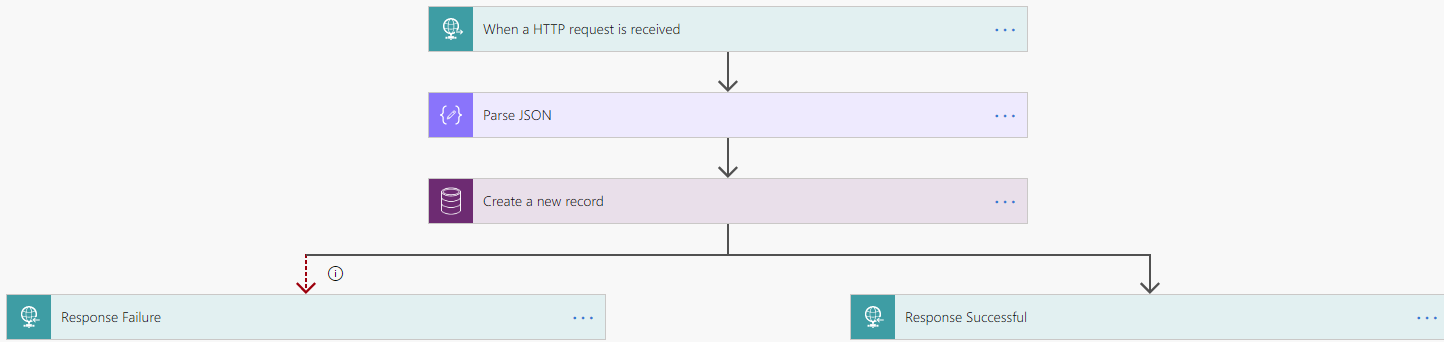
The flow contains a trigger for when an HTTP request is received, 2 actions for parsing the JSON from the HTTP request and creating a new record in CDS, and finally a parallel branch with two HTTP responses (configured after run) for a successful or failed response.
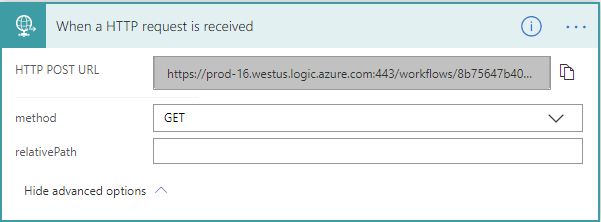
Let’s start with the trigger for when a HTTP request is received. The trigger does not contain any parameters or code, but is only used to provide us with the HTTP Post Url. The image below shows the trigger:
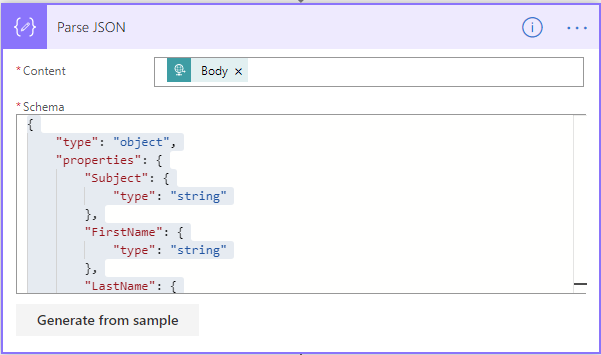
Next, we need add a Parse JSON action. We provide the Body of the HTTP request as the Content parameter, as provide the Schema (as shown below):
{
“type”: “object”,
“properties”: {
“Subject”: {
“type”: “string”
},
“FirstName”: {
“type”: “string”
},
“LastName”: {
“type”: “string”
},
“EmailAddress”: {
“type”: “string”
},
“MobilePhone”: {
“type”: “string”
}
}
}
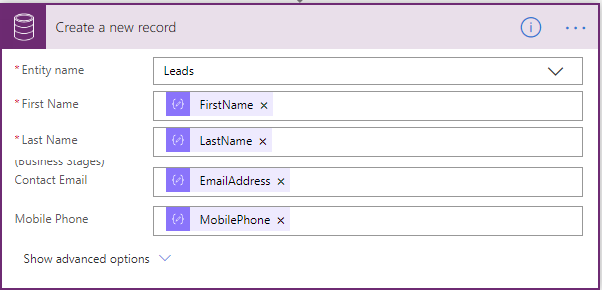
The next step would be to create a new record in our Common Data Service or Dynamics 365 environment. In our case, I used the Dynamics 365 environment, so this record was saved as a lead. The image below shows our Create a new record action from CDS.
Once we created a new record, when want to provide a response to the calling application whether this was successful or not. We do this by adding a parallel branch that will contain a Successful Response and a Failed Response.
For the response failure, we set it to run after the Create a new record action when the action has failed, is skipped or has timed out, and for the successful response we set it to run after the Create a new record action when the action is successful, as shown below:

Within the HTTP Responses, we provide the status code (200), a header if required and the Body of the message. The image below shows the Responses back to the application.

Once the flow is published, you can create a new record on the web page, and see the flow being executed record being created in CDS.
The source code for the Web application is available in Github. The same source code will be available for a future post which is being used for using Azure functions.