
In this article, I review the required steps of building and deploying your Power Apps solution from your Development environment to your test and production environments. We will add a approval trigger from Test to Prod, Unpack the solution and publish your managed solution as an artifact so that it can be used to import to the higher environments.
Although you can use both a Username/Password authentication against your environments or a Service Principal/client secret authentication, I prefer to use the Service Principal approach. In order to use the Service Principal approach, I need to create a Service Principal account and App Registration in Azure.
You can follow the link below, which is a previous blog that I wrote to configure oAuth or Service Principal/App Registration.
https://www.ariclevin.com/Azure/Post/configuring-oauth-cds
Adding the Application User, and assigning the role to the Application User will have to be done in all environments where you want this to be configured.
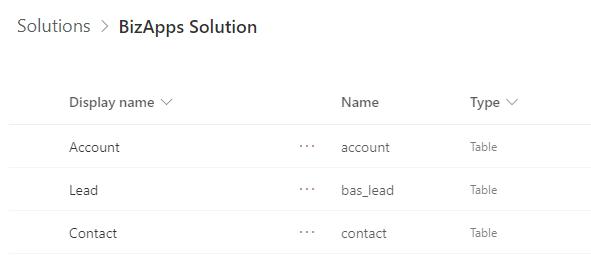
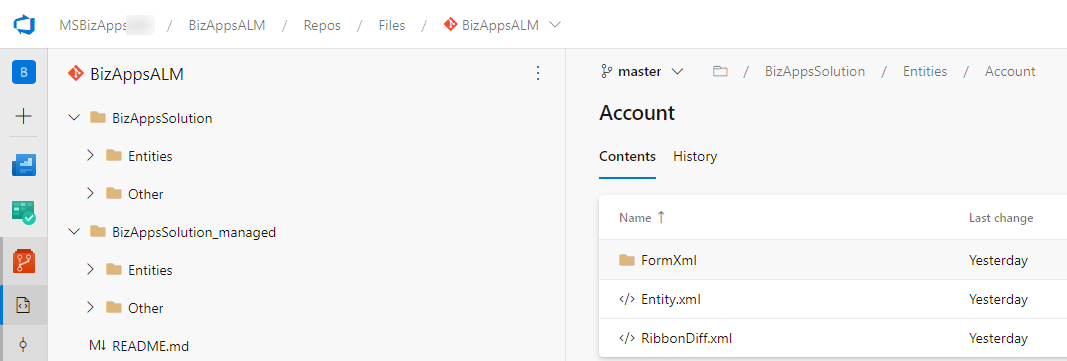
Let’s first take a look at the solution that we created in our dev environment. The solution contains the Account and Contact entities, as well as a custom Lead entity that was created.
Assuming that you already have a DevOps environment, let’s take a look at what we need, or what we have created.
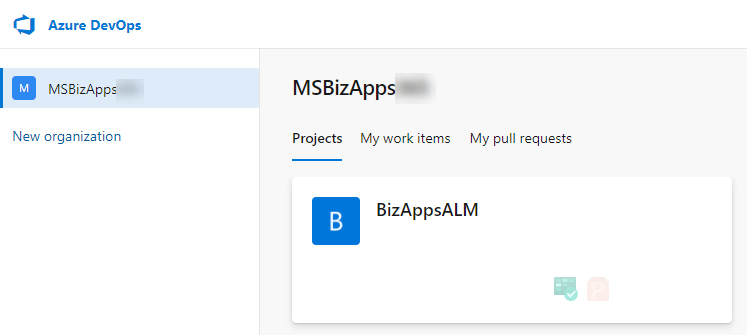
We created a new DevOps instance called MSBizApps and within it the BizAppsALM project. We also created a new Repo for that project.
Now, we can get started. The first step is we need to create a Pipeline that will export the solution file. Based on your configuration, there are various steps that you might take. In the screenshot below I cover all the necessary steps. I duplicated the Export Solution and the Unpack solution so that you can determine whether you will be using managed or unmanaged solutions, but the recommended approach is using managed solutions.
https://docs.microsoft.com/en-us/power-platform/alm/solution-concepts-alm
Per the documentation Unmanaged solutions are used in development environments while you make changes to your application. Managed solutions are used to deploy to any environments that isn’t a development environment for that solution, such as Test/QA, UAT, SIT and production.
You can export your unmanaged solution and unpack them, so that you will have a copy of your unmanaged solution source in your DevOps repository.
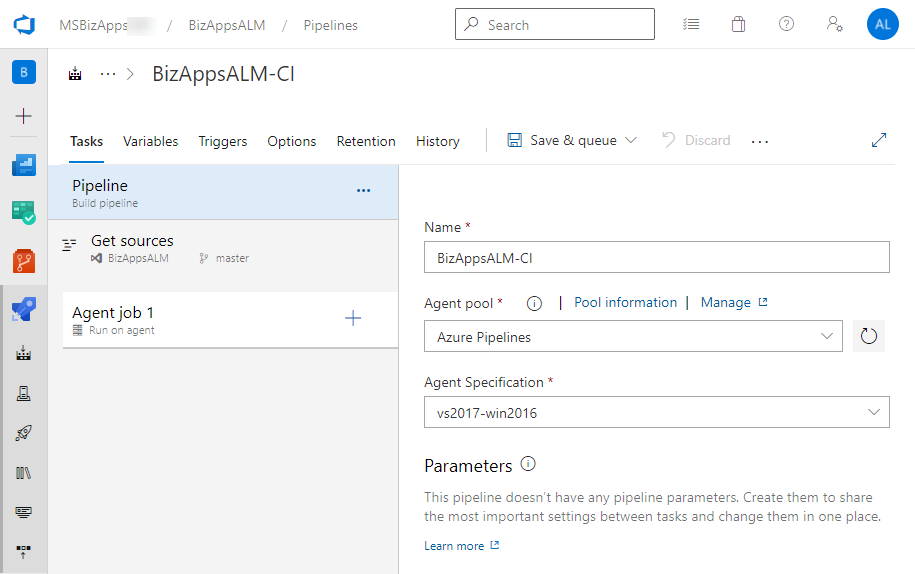
Let’s start with creating a new pipeline by selecting Pipelines and choosing the New Pipeline option. Select the Use the classic editor link on the New pipeline (Where is your code?) page, select the Azure Repos Git that you created, and in the Select a template page, click on the Empty job link. This will open up the new pipeline page. Let’s start by giving the pipeline a name. You can use any name that you would like. In our case, I used BizAppsALM-PublishExportUnpackGit.
We will need to add various tasks to get the solution ready. Let’s go over these steps and the configuration one by one.
The first task, that is a prerequisite for anything that we do with the Power Platform Tools is the Power Platform Tool Installer. There is no configuration requirements for this task.

The next task is to Publish the customizations. In this task too, there is not much configuration with the exception of setting the authentication type and the Connection String.
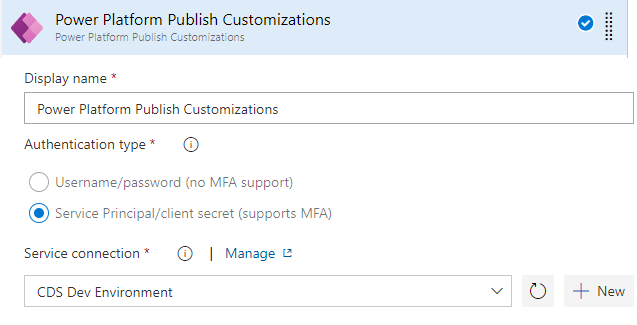
If you have not set your connection string yet, you can do so by clicking on the + New button to the right of the Connection String drop down. This will ask you for the environment url, directory (tenant) id, application (client) id and client secret, as well as the name for the connection string. Once you create it you will be able to use the connection string in your code. You should create connection strings for Dev, Test and Prod (or whatever other environments you need).
The next task is to export our solution, we have to possibilities here, to export as unmanaged or managed, but before we export our solution, let’s go ahead and create a variable that will store the solution name. We do this by clicking on the variables tab, selecting Pipeline variables and creating a new variable. We will call the variable SolutionName, and enter the value with the name of the solution (as shown in the image below).

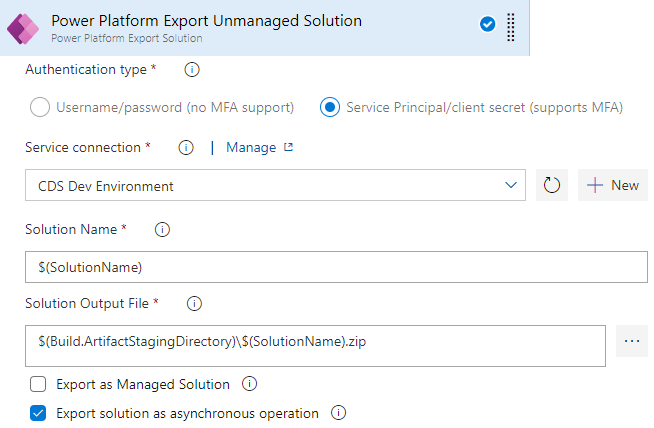
Now, let’s continue with the previous task of exporting the solution. In the case of exporting the solution as an unmanaged solution, we will need to provided the authentication information, the solution name and the solution output file. We should also check the option to export the solution as asynchronous operation. The screenshot is shown below. Notice that we use the variable $(SolutionName) instead of the actual name of the solution.
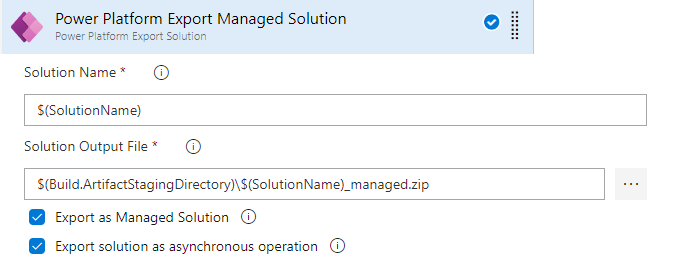
The logic for exporting the solution as managed is very similar. The only differences are the Solution Output file name and the Export as Managed solution checkbox have to be checked.
You will notice in the two tasks above that the Solution Output file contains the Build.ArtifactStagingDirectory variable. This is a predefined variable that can be used anywhere within your pipeline. The link below shows the list of predefined variables in Azure DevOps/Azure Pipelines.
https://docs.microsoft.com/en-us/azure/devops/pipelines/build/variables
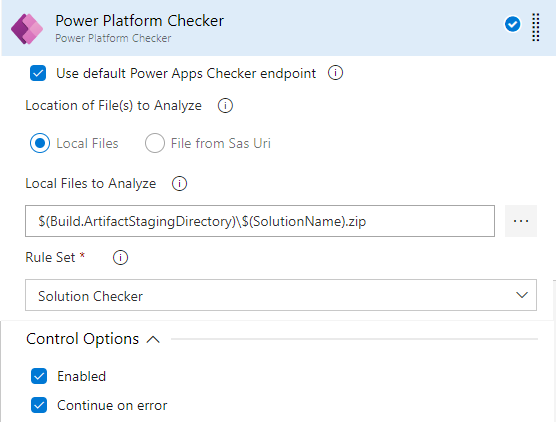
The next task, which is an optional task if you would like to add to your pipeline is running the Power Platform Checker on your solution file. You can specify the name of your solution file here and the rule set whether this is a Solution Checker rule set or a Certification rule set for an AppSource Certification. You can also specify whether this process should fail if there are errors. If this is only for your internal deployment, you should make sure that you specify the Continue on error option.
The next task, which is the final task that uses the Power Platform Build Tools is to Unpack the Solution. This will create individual files of all the components that make up the solution. You can unpack the unmanaged solution as well as the managed solution. This will be then deployed to source control and will contain the history of your solution deployments.
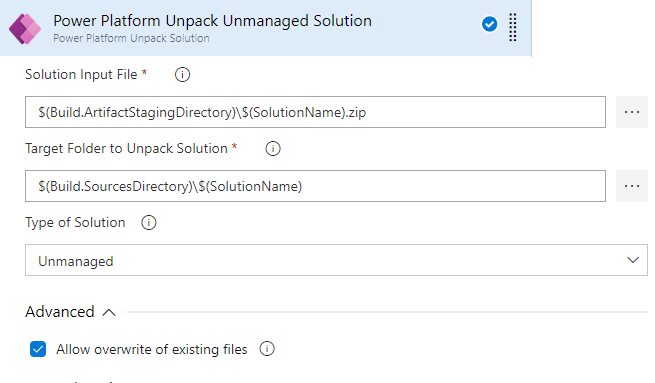
Let’s start with the unmanaged solution. We need to provide the solution name and the target directory name. Again in this case we will use some of the predefined variables to store the extracted files. The screenshot below contains the unmanaged configuration.
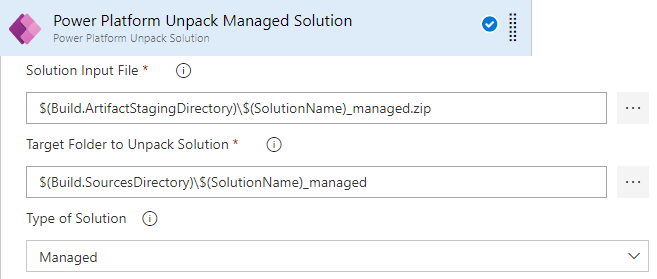
The unpack solution for the managed solution looks exactly the same with the exception of the solutions names and the type of solution.
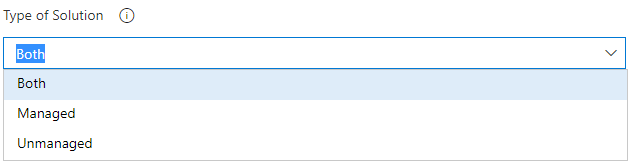
When you do this, you will notice that you have the ability to combine these two together, as the type of solution contains options for Unmanaged, Managed or Both.
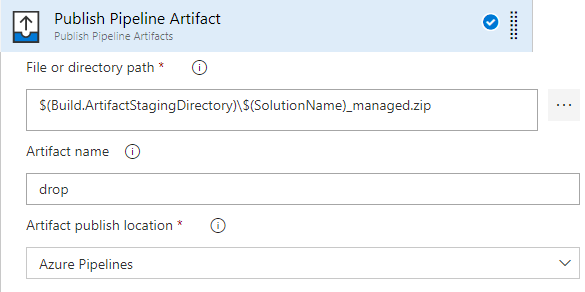
As we want to deploy this later to our higher environments, the next task would be to publish an artifact that will contain the managed solution. The Publish Pipeline Artifact task allows us to specify the location of the artifact that was used from the export of the managed solution (as this is what we will use to deploy to the higher environments.
We create an artifact name called drop which will contain the managed solution, and then publish it to Azure Pipelines.
The final step will be to publish this to our Source Control system. This will deploy your unmanaged or managed solution based on what you have created in previous steps. If you created both managed and unmanaged it will deploy them both to Source Control.
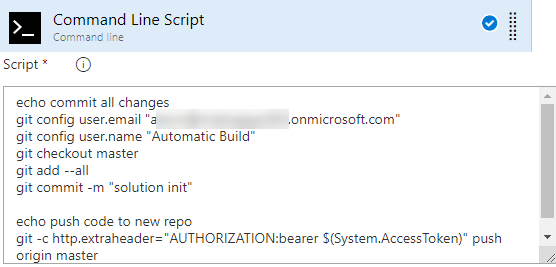
The below script contains the text that should be used in this task:
echo commit all changesgit config user.email "user@myorg.onmicrosoft.com"git config user.name "Automatic Build"git checkout mastergit add --allgit commit -m "solution updates"echo push code to new repogit -c http.extraheader="AUTHORIZATION: bearer $(System.AccessToken)" push origin masterNow that we have finished our solution we can go ahead and Queue it up and run the solution.
If we take a look at our source control after the solution has been run we will see that the our repository contains two folders which contain the source for the managed code and the unmanaged code, as seen in the screenshot below:
The next part is to create the release pipeline. In our particular case we have three environments: Dev, Test and Prod. Dev is our unmanaged environment, and test and prod are the managed environment. This part is actually simple and straight forward.
If you didn’t configure your connections for your higher environments, you should do it now. Let’s go ahead and start with a new release pipeline.
In Azure DevOps, under Pipelines, click on Releases, and select New to create a new release pipeline. The New release pipeline window will open with a panel showing on the right hand side. In the Panel click on the Empty Job link to start with an empty job (as shown below):

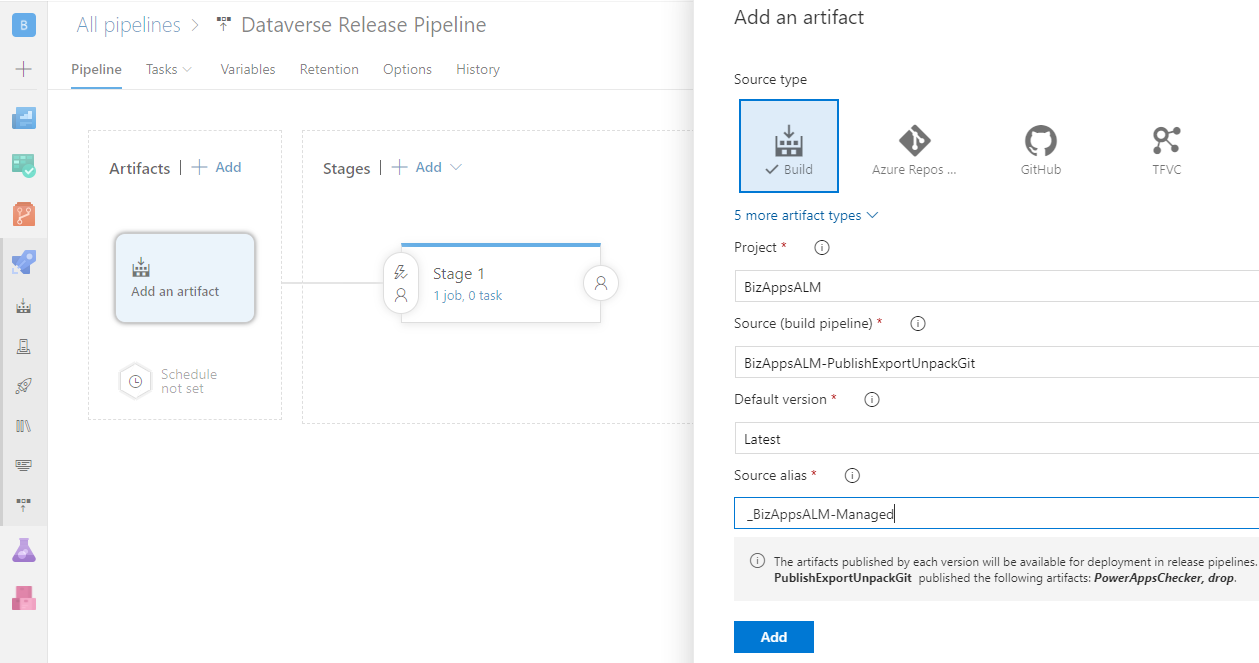
Start by giving your release pipeline a name, and adding an artifact. The artifact will be the name of the pipeline that you finished creating. Once you select the Build Pipeline, it will default to the latest version and you can provide a Source alias (friendly name) for this artifact.
Next we will create a deployment stage to our test environment. By default one stage will already be created. Give a name to the stage, and click on the link that says 1 job, 0 tasks.
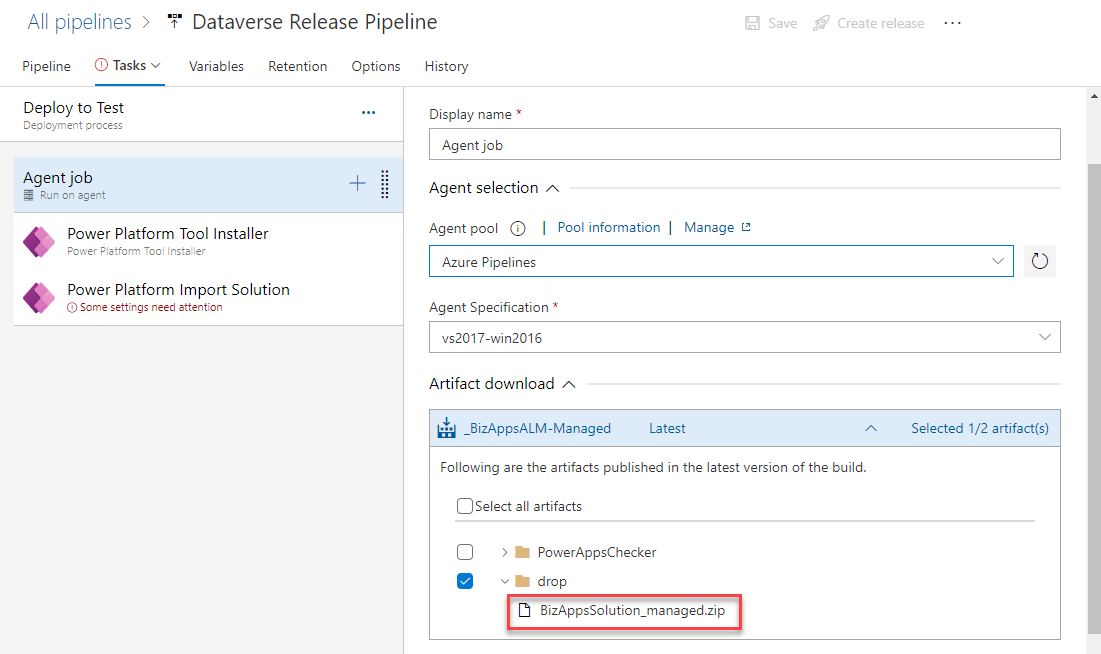
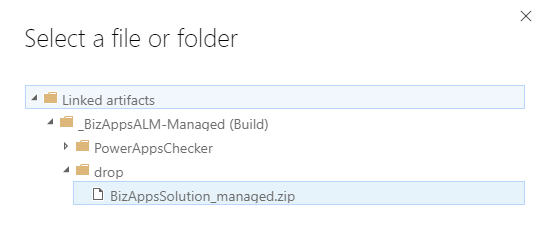
We will add two tasks to this stage. The first will be the Power Platform Tool Installer, and the second will be the Power Platform Import solution task. Before we configure this, let’s go ahead and take a look at the agent job. At the bottom of the Agent Job, under Artifact download section, we can see the artifacts that will be downloaded, and in our case the BizAppsSolution_managed.zip, which was added in one of the previous steps as an artifact.
Next let’s look at the Power Platform Import solution. Here we will have to select the connection to use, and the file or folder where the solution will reside. When we click the … next to the Solution name, it will popup a window which will allow us to select the artifact that was previously added to the pipeline.
Once we selected the solution input file, we need to check the Import as a Managed solution option and to run the import asynchronously.
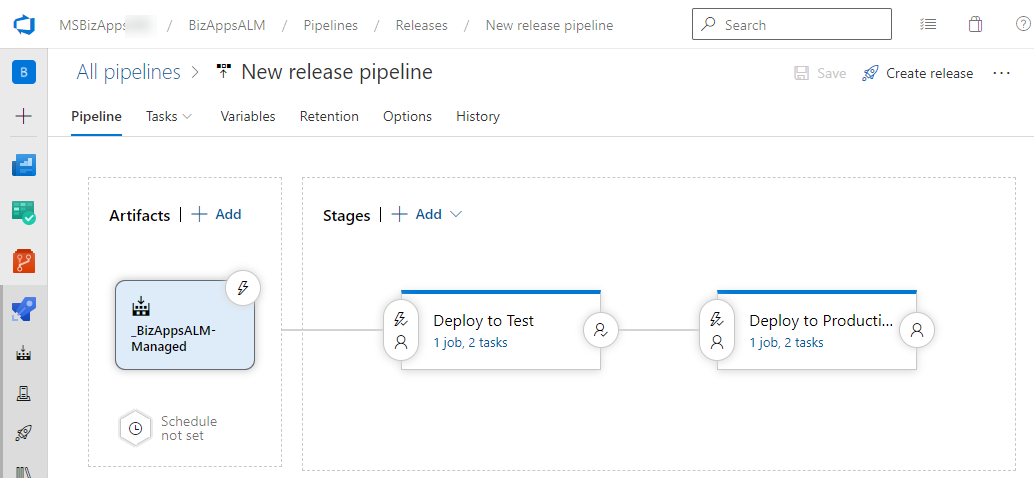
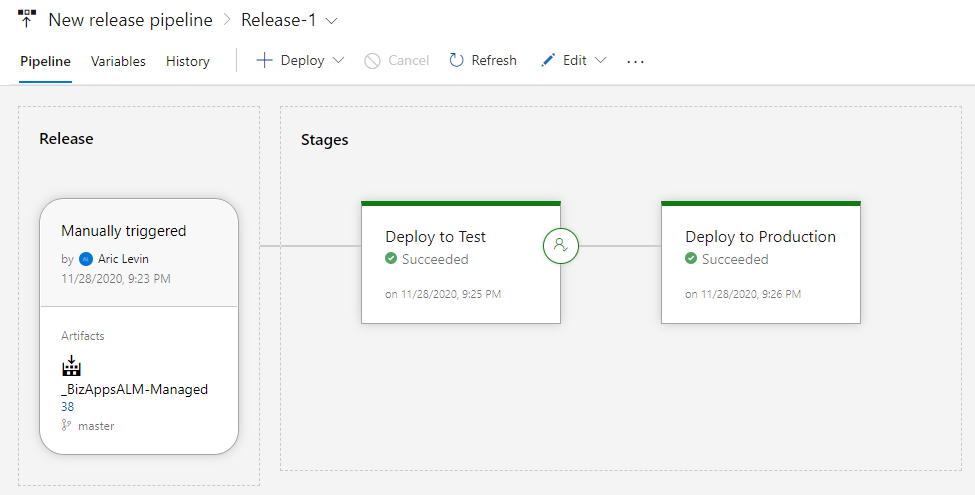
The exact same steps will need to be follows for production environment by creating a new stage. Once we have created the stage for production as well, our final release pipeline will look like this:
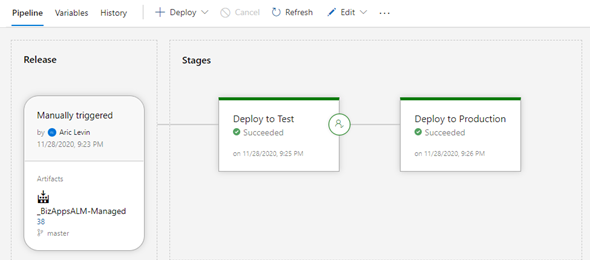
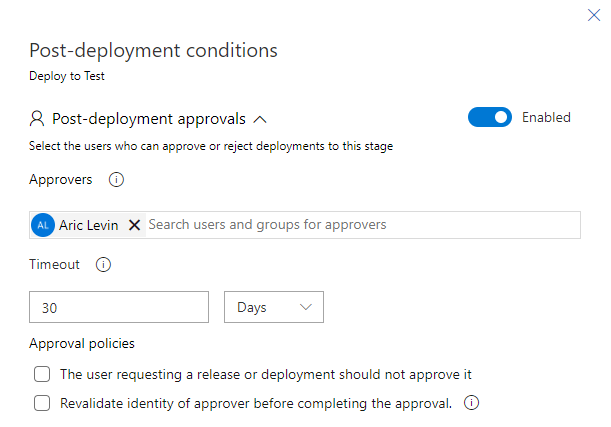
The only thing that is still needed is to add the approval for going from test to production. When we hover over the person icon at the right of the Deploy to Test, we will see the text Post-deployment conditions. When we click on this, we will see a panel that specifies different conditions which includes Approvers, Gates and Auto-redeploy triggers.
When we enable the Post-deployment approvals and set an approver, the approver will get an email notification specifying that they must approve this stage in order for the next stage to execute. If you have multiple environment for QA, UAT, SIT, etc… that required deployment prior to Production, you can create these approvals at any of the stages.
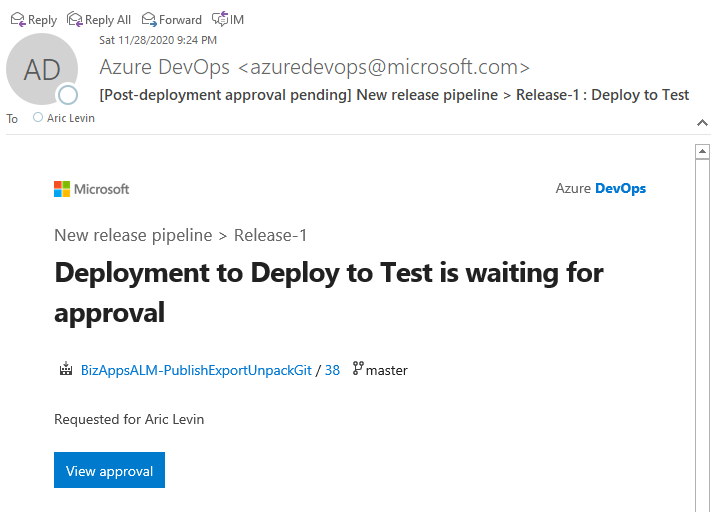
When the pipeline is run, and deployed to QA, it will send a notification email to the Approver specifying that an approval is required, as shown in the image below. The approver can view the approval and then approver it. Once approved, the pipeline will continue to the next stage.
After you are done with the pipeline and approvals, the pipeline will look as follows:
Now that you are done, you can provide triggers and schedules, and create the release. I hope this post was educational and provided some insights to the benefits of using ALM as part of your solution deployment processes.