
There are various organizations that for whatever reason, whether it be trust or security are not comfortable using the Microsoft-hosted agents, and would like to use self-hosted agents within their own corporate environment.
In this article, I will go through the steps of creating a self-hosted agent, and then configuring a pipeline that will move your solution between the different environments.
Let’s go ahead and start by creating our agent. The first thing that we have to do is create a personal access token. A personal access token is used as an alternate password to authenticate to Azure DevOps. Personal Access Tokens are easy to create and revoke them if they are no longer required.
We start by clicking on the User Settings Icon on the top right corner of our DevOps environment, and selecting Personal Access Tokens from the menu.
![]()
If you don’t have any tokens, click on the New Token link button

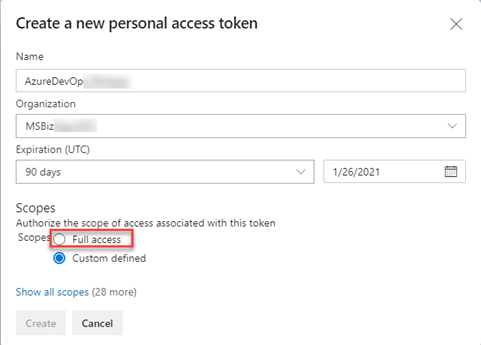
This will pop up the Create a new personal access token panel. Provide a name for the token, select the organization and expiration date. You can create a custom defined scope and set the appropriate permissions that the token will have, or give it Full access to your DevOps environment. For the purpose of this article, we will provide it with Full access, but you can also select Agent Pools (read, manage) and deployment group (read, manage). You can click on the Show all scopes at the bottom of the panel to see all available authorization scopes for the personal access token. The image below shows the basic configuration.
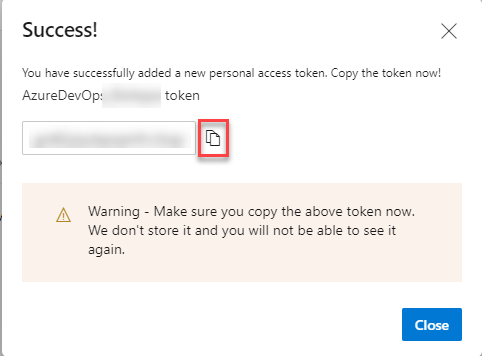
Once the personal access token is created (and before you close your window), copy the token. You are going to need it later on. Microsoft does not store the token, so you will not be able to see it again.
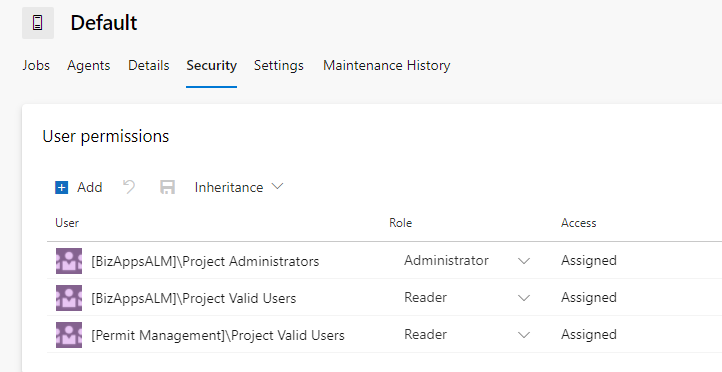
Next, we will go ahead and configure the Security for the Agent Pool. Azure DevOps organization owners and server administrators have permissions by default.
Navigate to the Agent Pools by clicking on the Azure DevOps logo on the top left, select Organization Settings on the bottom left, and then in the left hand navigation, click on Agent Pools. This will display the list of Agent Pools in the center pane. Select the pool that you want to configure, and click on the Security tab in the newly opened pane. If the user account that will be used is not shown, then make sure that you or an administrator can add that user account. You cannot add your own user account, but you should be able to add a group that you are a member of.
Now click on the Agents tab, and let’s create our agent. If there are no available agents, you will see a button on the screen (New agent) to create your first agent.
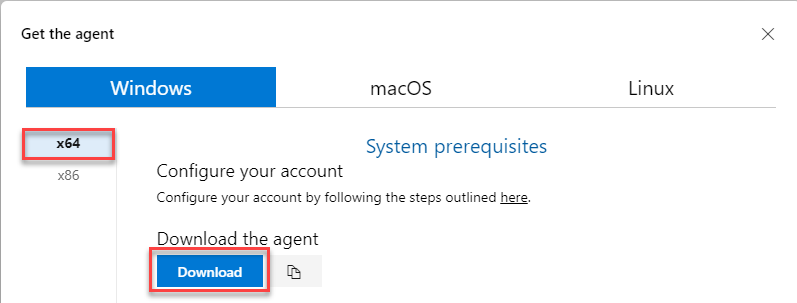
This will pop up a dialog where you can select your operating system and download the agent.
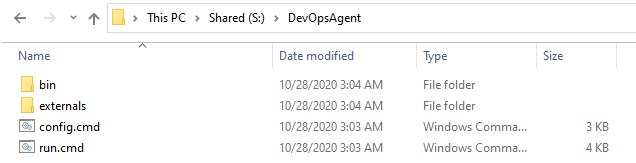
Now, that you have downloaded the agent, we can go ahead and install it and configure it. Extract the agent to a directory of your choice, and run the config.cmd command. In our case we extracted the agent files into the C:DevOpsAgent directory.
Once you run the config.cmd batch file, you will be asked for the Azure DevOps services url, which is https://dev.azure.com/{organization_name}, and then enter or paste the personal access token that you created previously.
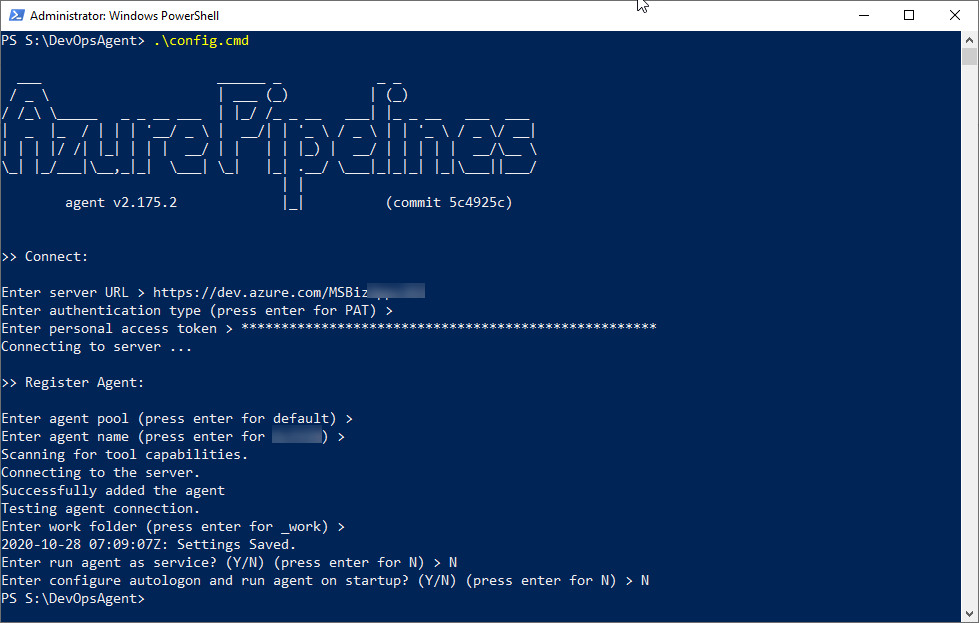
To determine whether you want to use the agent in Interactive Mode or Service Mode, you can click on the link below and check the differences on the Microsoft Docs website:
Before we activate the Agent, let’s go ahead and create our first pipeline. We will make this pipeline simple that will include publishing the customizations in our dev environment, exporting the solution as managed and unmanaged and deploying this to our test environment as a managed solution.
Let’s go ahead and create a few pipelines to test this process.
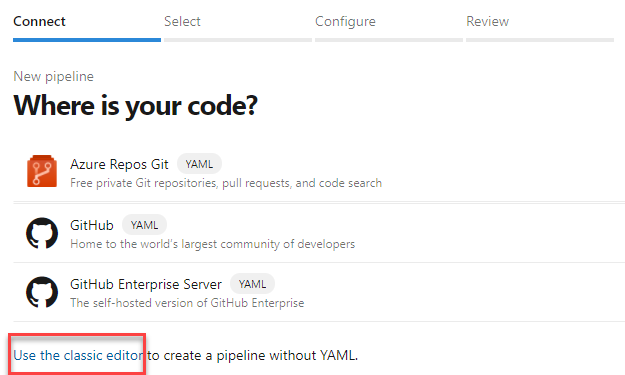
Let’s go ahead and create our first pipeline. The first step is to connect to the Repo. We will use the classic editor to create a pipeline without YAML.
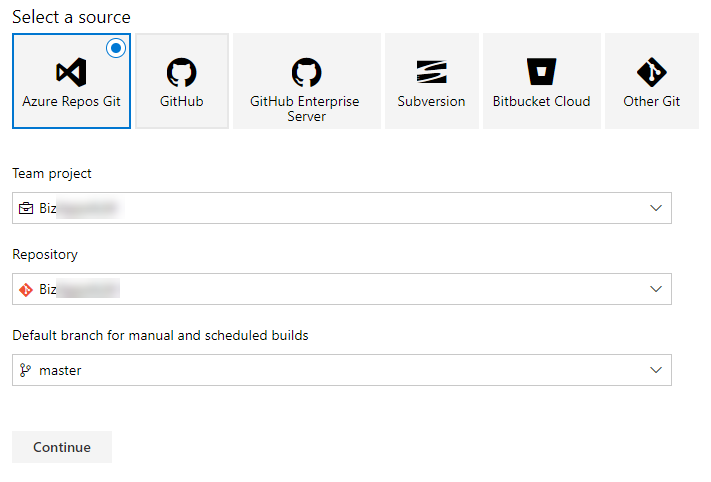
In the select source page, we will select our Azure Repos Git, and select the Team Project, the Repository and the Default branch that will be used for our manual or scheduled builds.
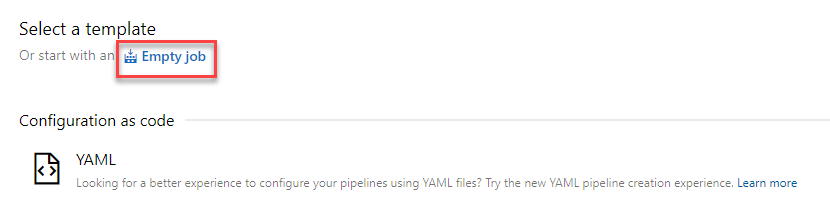
In the select template page, we will start with an Empty job.
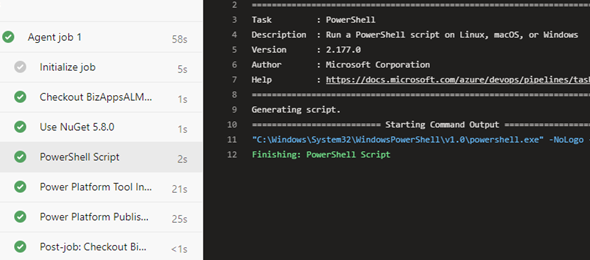
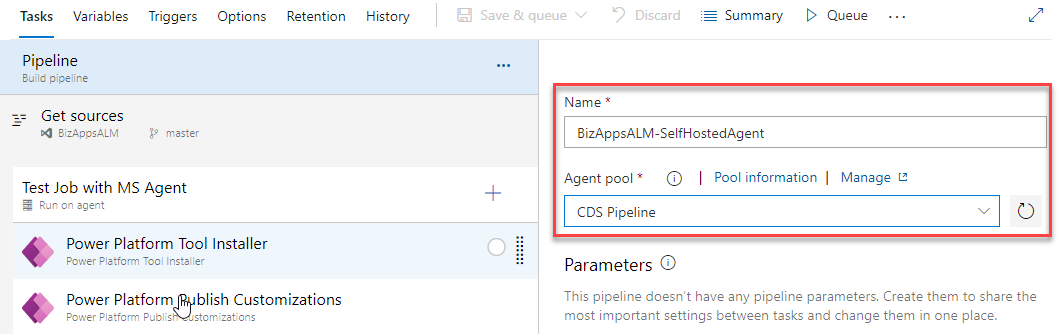
Next we will start configuring the pipeline and adding the tasks to be used with the agent. The image below shows the test pipeline that we created. The pipeline only uses two tasks, which is the Power Platform Tool Installer and the Power Platform Publish Customizations.
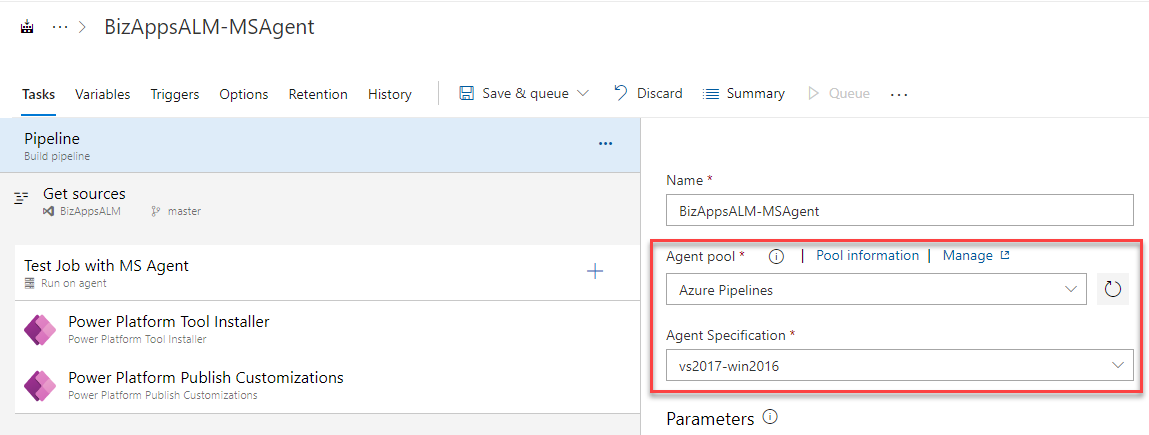
Of course this is not a very realistic pipeline, as we usually need something that does more than just publish customizations, but the purpose is just to test that this is working with a Self-Hosted Agent. Just to make sure the pipeline works, we will first try it with the MS Agent.
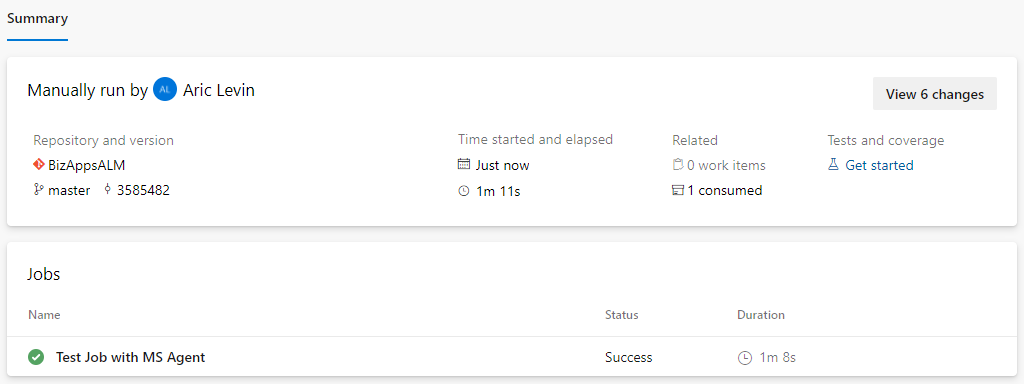
I will go ahead and click the Save and Queue button and run this pipeline. After about 60 seconds, we get the results that the pipeline executed successfully.
Next, I will go ahead and edit the pipeline, and change the agent pool to the self-hosted agent pool that I created, click on the Save and Queue and then run the process.
This should have been straight forward, but it seems like there were some issues with running this we encountered a few issues with the Tool Installer.
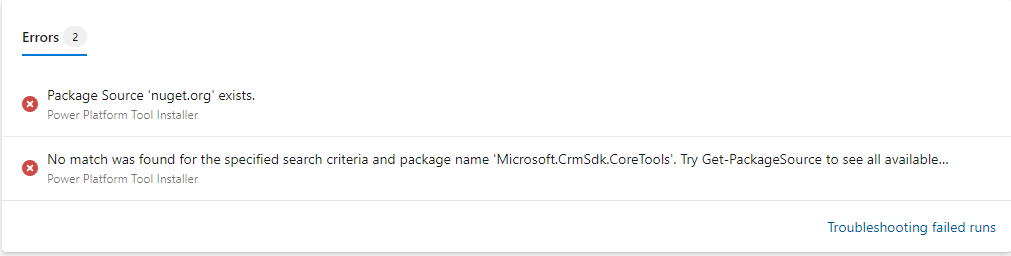
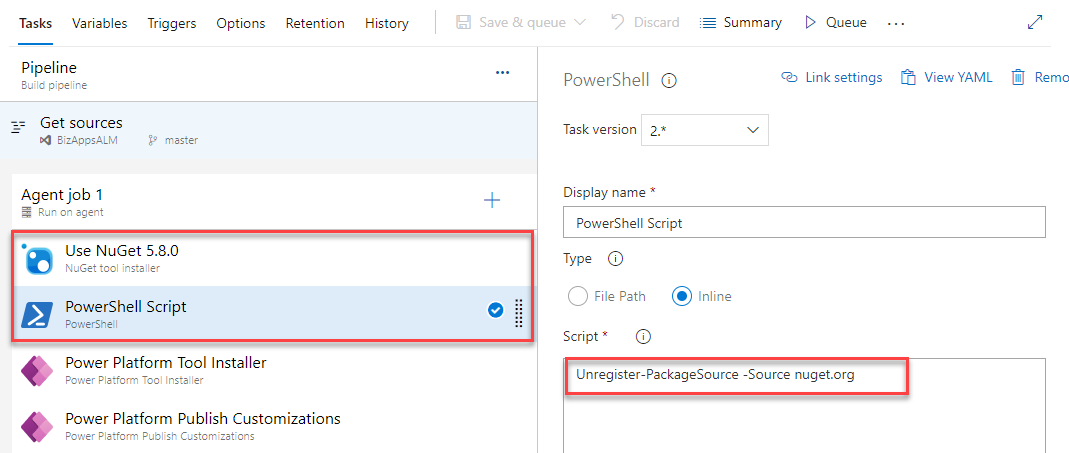
To get past this, (and after contacting Microsoft Support) we had to make some modifications to the pipeline, which included the installation of Nuget package and a Powershell script to Unregister the Package Source before running this.
This issue that is addressed is related to the agent itself and not the PowerApps task. The following two links talk about this in further detail:
https://github.com/microsoft/PowerApps-Samples/issues/123#issuecomment-641053807
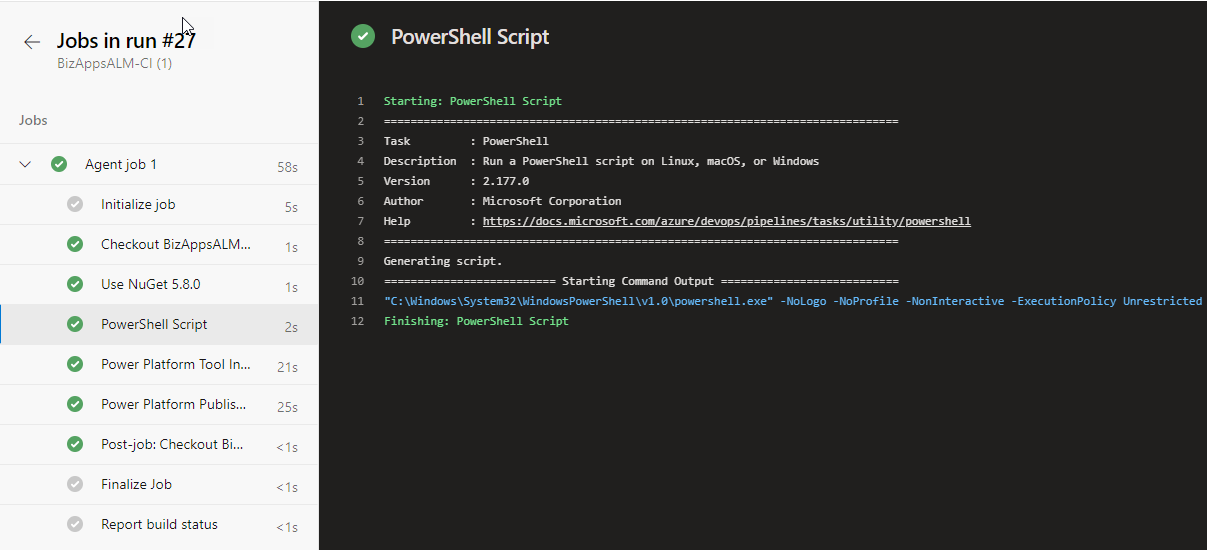
After making these changes, we were able to execute the package correctly.
Even though this solves our problem, and enables us to go ahead and create a pipeline using Power Tools, the underlying problem still exists.
I received an update from Microsoft (Power Apps support) last week, that they were able to reproduce the issue using a local build agent, and based on the diagnostics log, what seemed to happen is that the machine where the agent was installed (a Windows 10 machine) had a PackageManagement and PowerShellGet in the older 1.0.0.1 versions, but the hosted AzureDevOps has more modern versions, 1.47 and 2.2x respectively.
Once Microsoft removed the newer versions they were able to reproduce this issue. As a temporary workaround, we were told that we could update these two modules for the build agent user and then retry. The following are the steps that are needed to follow:
- Install-PackageProvider -Name “NuGet” -Force -ForceBootstrap -Scope CurrentUser -MinimumVersion 2.8.5.208
- Install-Module -Name PackageManagement -MinimumVersion 1.4.7 -Scope CurrentUser -Force -AllowClobber
- Install-Module -Name PowerShellGet -MinimumVersion 2.2.5 -Scope CurrentUser -Force -AllowClobber
Since this issue was reported, the timeline for a fix is supposed to be coming early this week (Ween of 11/23/2020), when a new version will be published to the Visual Studio marketplace which will check and update the package providers.
Hopefully everyone which will be working with self-hosted agents can benefit from this update. I will update this post was the change has been implemented.